
One of the most common scenarios that we come across is managing Kubernetes rolling updates. In this post we will cover how to do it and the changes required in YAML file.
You should keep a note of your application as well if you’re doing rolling updates. If running multiple versions of the same application isn’t going to work out for you, then rolling updates are not for you. In such a scenario you should consider the type “recreate”. Rolling updates help in update deployments with no downtime at all.
Kubernetes Rolling Update Process
Most of you would be aware of the fact that deployments would deploy replicasets. These replicasets will be deploying the pods. When updates are applied, deployment creates a new replicaset and creates new pods. At the same moment older pods are deleted. The total number of pods are managed by maxSurge and maxUnavailable.
maxSurge
Maxsurge tells us how many pods we can go up then the required number of pods. Lets say our current deployment has created a replicaset with 3 pods. Now if we set maxSurge to 2, then temporarily we can have up to 5 pods.
maxUnavailable
MaxUnavailable tells us how much “under” can we go. Similar to above scenario, if we keep MaxUnavailable value as 1, it means that it will always maintain minimum 2 pods at all times.
Note: maxSurge and maxUnavailable could also be set as percentage.
Tutorial: Kubernetes Rolling Updates
Lets go ahead and use sample YAML from Kubernetes deployment documentation page with a slight change. You check the YAML file in my GitHub. If you don’t know how to work with YAML files, here’s a detailed post on how to create Kubernetes YAML files.
     1  apiVersion: apps/v1
     2  kind: Deployment
     3  metadata:
     4    name: nginx-deployment
     5    labels:
     6      app: nginx
     7  spec:
     8    replicas: 3
     9    strategy:
    10      type: RollingUpdate
    11      rollingUpdate:
    12        maxSurge: 2
    13        maxUnavailable: 1
    14    selector:
    15      matchLabels:
    16        app: nginx
    17    template:
    18      metadata:
    19        labels:
    20          app: nginx
    21      spec:
    22        containers:
    23        - name: nginx
    24          image: nginx:1.14.2
    25          ports:
    26          - containerPort: 80
Line 8: Replicaset is set to 3. We will have 3 pod replicas running at any given time.
Line 9 – 13: This shows the strategy part. We are using rolling updates. maxSurge is set to 2, i.e. we can have up to 5 pods temporarily. maxUnavailable is set to 1 which means that at least 2 pods will always be running at a given moment.
We will deploy this on the Kubernetes cluster using following command.
# Create deployment
kubectl create -f nginx.yaml
Here’s the output.
$ kubectl create -f nginx.yaml
deployment.apps/nginx-deployment created
lets check the rollout history.
$ kubectl rollout history deployment nginx-deployment
deployment.apps/nginx-deployment
REVISION  CHANGE-CAUSE
1         <none>
As you could see that only 1 revision is there. Now, we will change the version of the image to 1.16.1 and then apply the change.
...
    22        containers:
    23        - name: nginx
    24          image: nginx:1.16.1
    25          ports:
...
$ kubectl apply -f nginx.yaml
deployment.apps/nginx-deployment configured
$ kubectl get all
NAME READY STATUS RESTARTS AGE
pod/nginx-deployment-559d658b74-hw68c 1/1 Running 0 4s
pod/nginx-deployment-559d658b74-qhhsf 1/1 Running 0 4s
pod/nginx-deployment-559d658b74-xphmx 1/1 Running 0 4s
pod/nginx-deployment-66b6c48dd5-96fg7 0/1 Terminating 0 50s
pod/nginx-deployment-66b6c48dd5-j6m8l 0/1 Terminating 0 50s
pod/nginx-deployment-66b6c48dd5-nmhwg 0/1 Terminating 0 50s
NAME TYPE CLUSTER-IP EXTERNAL-IP PORT(S) AGE
service/kubernetes ClusterIP 10.96.0.1 <none> 443/TCP 6d19h
NAME READY UP-TO-DATE AVAILABLE AGE
deployment.apps/nginx-deployment 3/3 3 3 50s
NAME DESIRED CURRENT READY AGE
replicaset.apps/nginx-deployment-559d658b74 3 3 3 4s
replicaset.apps/nginx-deployment-66b6c48dd5 0 0 0 50sAs seen from above output, a new replicaset has been created and previous one is empty. Lets take a deeper look into events that took place on deployment.

As you could see the replicaset was scaled up to 2 which means there were 5 pods at a certain moment. Post that older replicaset scaled down by 2 and newer one scaled up tp 3, again giving a total of 5 pods. Once all pods are up and older ones are deleted and 3 pods are maintained while the old replicaset is empty.
Check differences in various revisions
Lets check what was there in first revision and what got changed in second revision.
# Check the details of first revision.
kubectl rollout history deployment nginx-deployment --revision=1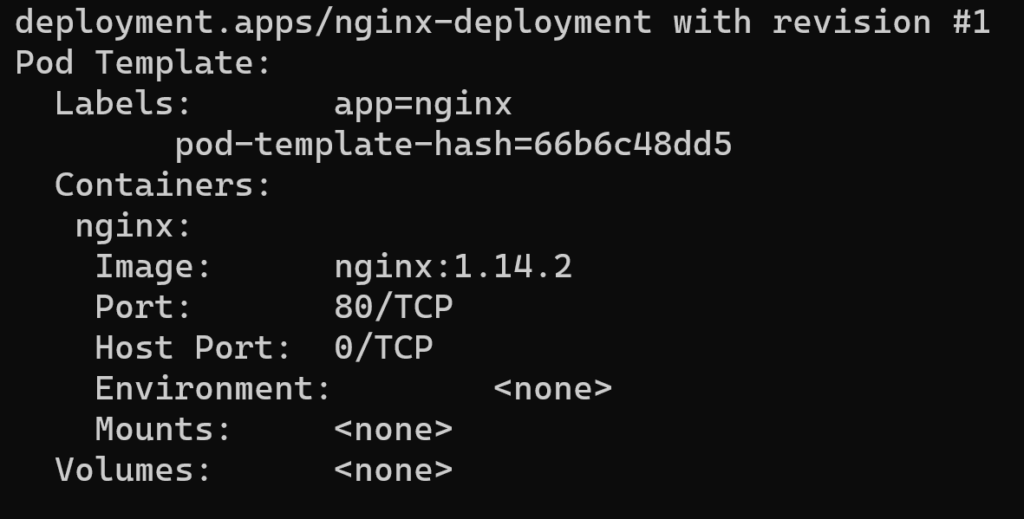
# Check details of revision 2
kubectl rollout history deployment nginx-deployment --revision=2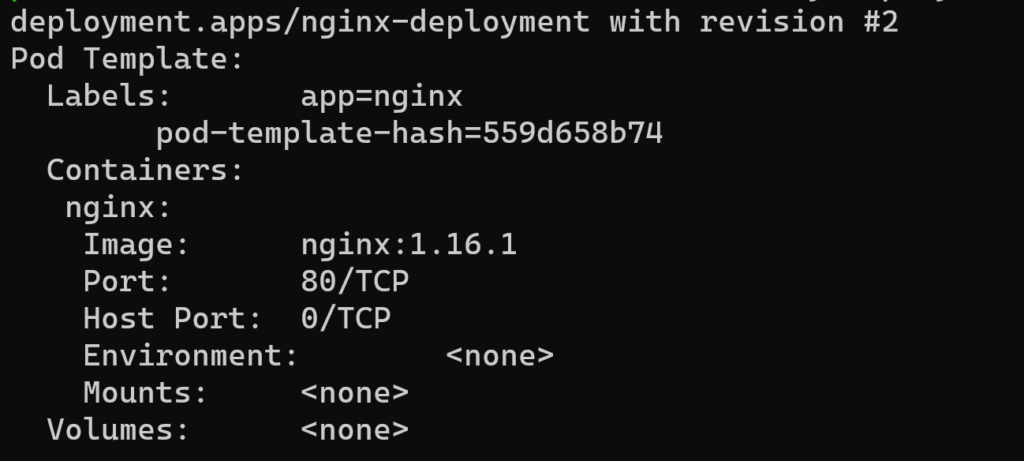
Undo the changes deployed in Kubernetes rolling updates
How often we update the app and conclude that we made a huge mess somewhere. How do we roll back the changes? Just a simple command.
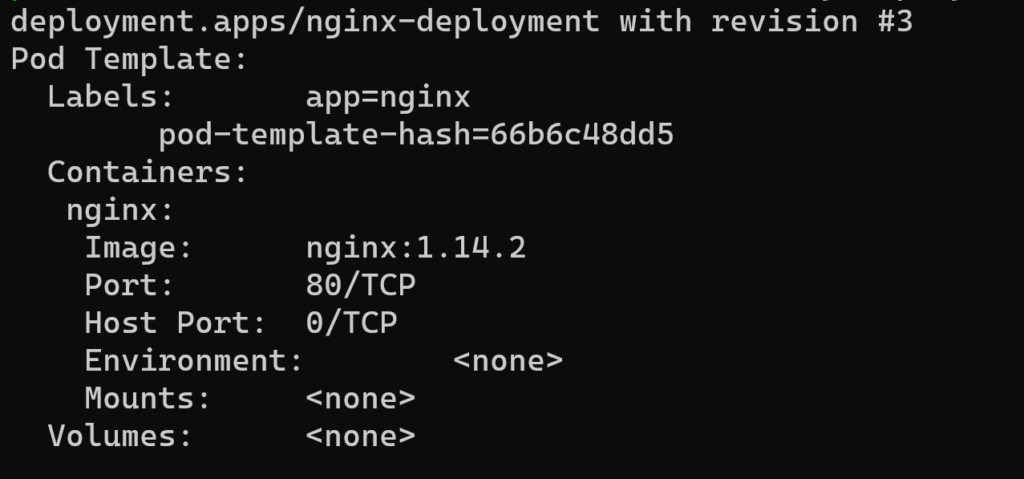
# Undo the changes
kubectl rollout undo deployment nginx-deployment
Run “kubectl get all” and check the difference for yourself. At the same time, you should also see a revision 3. Lets check the details:
Next Steps
You can try deploying an AKS and try Kubernetes rolling changes in there for simplicity.