
This post is a tutorial on deploying Apache web server on Azure Kubernetes Service using persistent volumes. To use web server with several fronts, content is required to be served by all the instances. Persistent volumes are the resolution to overcome this overhead. We will use Azure Files for persistent volumes so that these volumes can be shared between more than one pod.
Here are the steps to be followed.
Create AKS Cluster
- Create AKS cluster. For creation purposes, we will use AZ CLI, however, it’s up to you to choose your method.
az group create -n <resource-group-name> -l <location>
az aks create -n <aks-name> -g <resource-group-name> --node-count 1 --generate-ssh-keys- Connect to the AKS cluster
az aks get-credentials -n <aks-name> -g <resource-group-name>
Create YAML for Persistent Volume, Deployment and Service
We need three important components: Persistent Volume Claim, Deployment and Kubernetes service. We will go through all the required YAML files to create these components.
Persistent Volume Claim
PersistentVolumeCalim is the resource type used to generate storage account dynamically. This will allow us to indicate the capacity we want to reserve for the shared folder and what Storage Class we want to use. For this example, since AKS already creates for us two StorageClass that cover both Azure Files and Azure Disk, I have chosen the corresponding one for what we need – Azure Files.
apiVersion: v1
kind: PersistentVolumeClaim
metadata:
  name: http-pvc
spec:
  resources:
    requests:
      storage: 10Gi
  volumeMode: Filesystem
  storageClassName: azurefile
  accessModes:
    - ReadWriteMany
Deployment
We will create the deployment file to define pods that will run our Apache web server. Following code will deploy:
- Three replicas
- Mount the volume to /usr/local/apache2/htdocs
- Pod with apache container
apiVersion: apps/v1
kind: Deployment
metadata:
  name: apache-server
spec:
  replicas: 3
  selector:
    matchLabels:
      app: web
  template:
    metadata:
      labels:
        app: web
    spec:
      containers:
        - name: apache
          image: httpd:2.4
          ports:
            - containerPort: 80
          volumeMounts:
            - mountPath: /usr/local/apache2/htdocs/
              name: html
      volumes:
        - name: html
          persistentVolumeClaim:
            claimName: http-pvc
Service
We will create service with type LoadBalancer. We will expose the same service to access our application.
apiVersion: v1
kind: Service
metadata:
  name: web
spec:
  type: LoadBalancer
  selector:
    app: web
  ports:
  - port: 80
    targetPort: 80
I have created a single file, named cieaks.yaml, containing all above 3 codes. Run kubectl command to deploy all these components
kubectl create -f cieaks.yamlYou should get an output similar to:
deployment.apps/apache-server created
service/web created
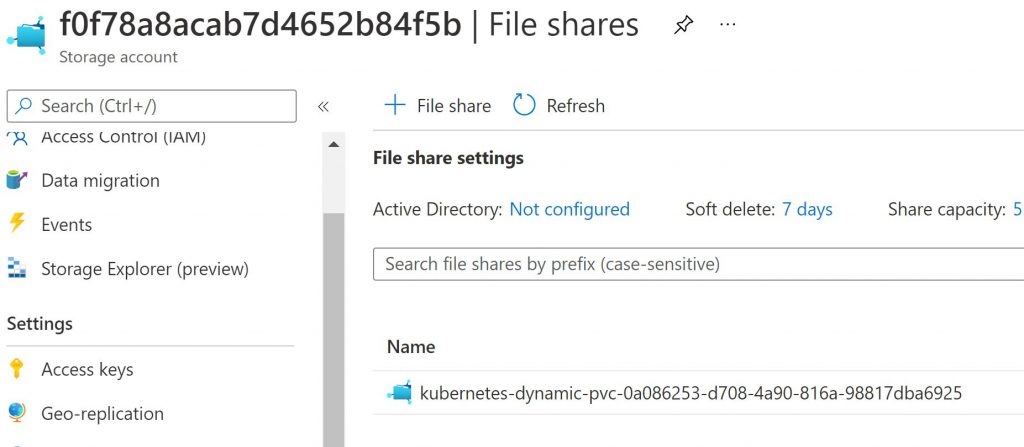
persistentvolumeclaim/http-pvc createdIf everything goes as per the plan, you should see a storage account in Azure portal. You should look into the “MC” resource group.

If you explore this storage account, you should see the File Share.
Post this, you can also check the PVC we created earlier using kubectl command.
kubectl describe pvc http-pvcYou should see an output similar to mine:

Above output shows that the volume is being used by three different pods. Since we added three replicas.
Time to check the final output.
Create a sample html file similar to following one. Upload the file(s) to the Azure Files we came across in above steps.
<html lang="en">
<head>
<title>My Sample Apache Page</title>
<meta charset="utf-8">
</head>
<body>
    My Apache test.
</body>
</html>
To browse the website/application we need the IP of ther “web” service. Run command to fetch services from your cluster.
kubectl get svcYou should see output similar to following:

Notice the public IP in the column “EXTERNAL-IP”? This is the IP of our web service. Take it, open a browser and browse! But here’s a problem – see it?
Bug in Apache while using SMB

Notice the content “: bytes Content-Length: 142 Keep-Alive: timeout=5, max=100 Connection: Keep-Alive Content-Type: text/html“, before our sample text from html body?
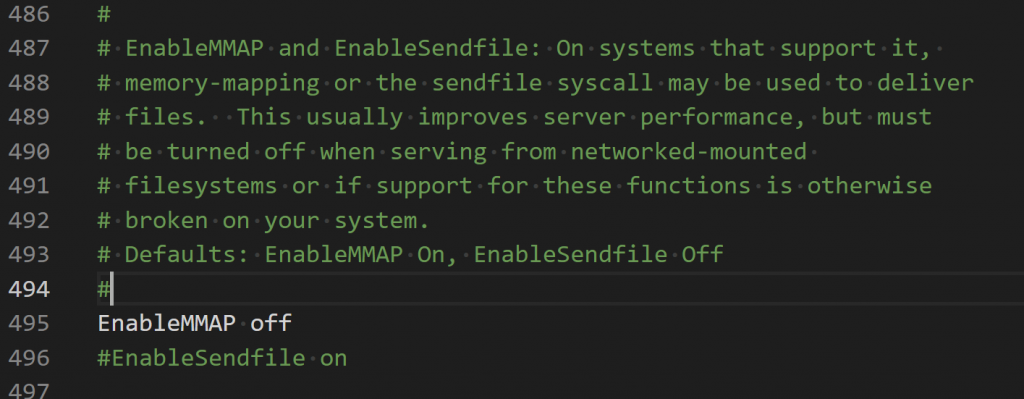
In some cases, or browsers, you may face a problem wherein a file named “download” is downloaded rather than opening the expected output. This is due to a bug present in Apache. It affects the Apache server when SMB is used to mount folders, in our case we did Azure Files. It is caused by EnableMMAP property. EnableMMAP controls if Apache server uses memory-mapping to read content from a file during delivery. Setting this property to “Off” should solve the issue.
Lets turn it off and save it. Run following command:
docker run --rm httpd:2.4 cat /usr/local/apache2/conf/httpd.conf > httpd.confThis command downloads the httpd.conf file by running a docker image “httpd” version 2.4. After this, uncomment line “EnableMMAP off”
After making the change, lets create a config-map to use the file to do so.
kubectl create configmap apacheconf --from-file=httpd.confOutput should be similar to this:
configmap/apacheconf createdFinally, modify the deployment yaml file to mount the above configuration:
apiVersion: apps/v1
kind: Deployment
metadata:
  name: apache-server
spec:
  replicas: 3
  selector:
    matchLabels:
      app: web
  template:
    metadata:
      labels:
        app: web
    spec:
      containers:
        - name: apache
          image: httpd:2.4
          ports:
            - containerPort: 80
          volumeMounts:
            - mountPath: /usr/local/apache2/htdocs/
              name: html
            - mountPath: /usr/local/apache2/conf/httpd.conf
              name: apache-config
              subPath: httpd.conf
      volumes:
        - name: html
          persistentVolumeClaim:
            claimName: http-pvc
        - name: apache-config
          configMap:
            name: apacheconf
Run the updated deployment:
kubectl apply -f cieaksdep2.yamlNow, the issue should be resolved. If not, please drop it in the comments and we will check it together.
